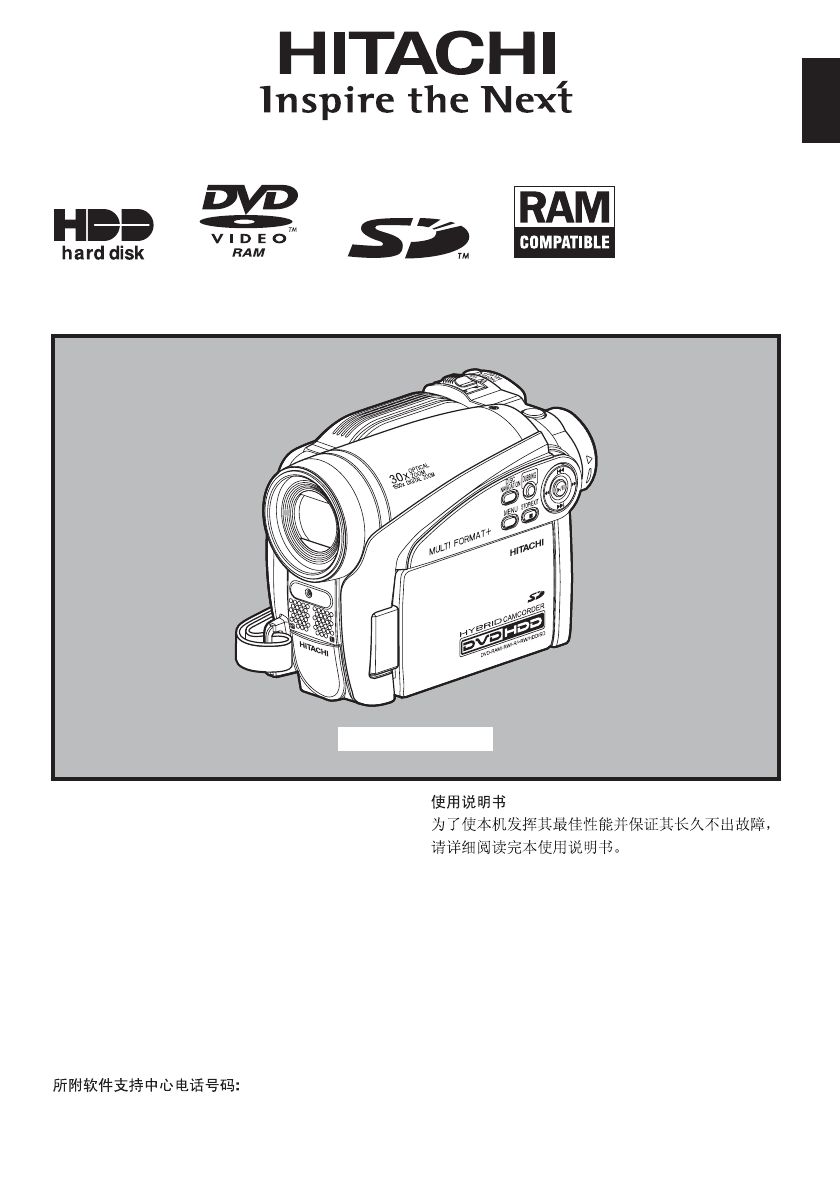
Hitachi DZ-HS500SW User Manual
Browse online or download User Manual for Camcorders Hitachi DZ-HS500SW. Hitachi DZ-HS500SW User's Manual
- Page / 160
- Table of contents
- TROUBLESHOOTING
- BOOKMARKS
- DZ-HS500SW 1
- Important Information 2
- IMPORTANT SAFETY INSTRUCTIONS 3
- Cautions When Using 4
- Cautions on HDD 4
- CARD ACCESS indicator 7
- ACCESS/PC 7
- Cautions When Storing 8
- Suggestions and Restrictions 8
- Block noise 9
- (Recording one scene 9
- Read This First 10
- About This Manual 11
- Introduction 12
- Table of Contents 13
- Disc Navigation 14
- Checking Provided Accessories 16
- Names of Parts 17
- Demonstration Function 20
- ATTACHING LENS CAP 21
- HDD/DVD/Cards 22
- HDD, DISCS 23
- INFORMATION ON DVD-R 23
- NOTES ON FINALISATION 23
- CAMERA/RECORDER 24
- AVAILABLE CARDS 24
- ●Handling card 24
- CAUTIONS FOR DISC AND CARD 24
- Preparations for Power Supply 25
- Setting Up the Battery 26
- ●Battery charged status 27
- REMOVING BATTERY 27
- EFFICIENT USE OF BATTERY 29
- Set to “OFF”: 30
- Set to “SD”: 30
- Set to “HDD”: 30
- Set to “DVD”: 30
- Viewing Images 31
- 1 Open the LCD monitor 31
- 1 Pull out the viewfinder 31
- 1 / 3 / 2007 8 : 00 32
- Date set up? 32
- Da t e Se t 32
- Initial Settings 33
- 1 Press or / button 33
- 2 Choose “Français”, and 33
- 1 Choose “Reset” on the 34
- 2 If you are sure that you 34
- LCD/EVF Setup 35
- 2 Use the 0// buttons 35
- 1 Press the MENU 36
- When recording data from PC: 38
- Basic Techniques 40
- On-Screen Information 43
- Checking Flow of Menu 48
- ●Flow of Full Menu 49
- MACRO RECORDING 50
- Manually Focusing Subject 52
- Using Full Auto Function 55
- 1 Press the FULL AUTO button 55
- Setting Up Camera Functions 56
- 4 Open the LCD 57
- Setting Up Record Functions 60
- “16:9 Off” specified 61
- (aspect ratio 4:3) 61
- “16:9 On” specified 61
- (aspect ratio 16:9) 61
- SELF-TIMER 64
- 1/ 3/2007 65
- 001/ 014All Progra 67
- 3 Press the button 68
- 2 Press the button 69
- CAPTURING PHOTO 70
- SEARCH PLAYBACK OF MOVIE 70
- SKIP PLAYBACK OF MOVIE 71
- PLAYING BACK STILLS 71
- 1 Press the MENU button 72
- 2 Choose the option 72
- 00:00:16 73
- 100—0003 73
- SELECTING MULTIPLE SCENES 74
- ●When using HDD 76
- ●When using card 78
- Dubbing on DVD 79
- 1 Press the DUBBING button 80
- 2 From the Dubbing 80
- DUBBING) 81
- “SELECT” DUBBING) 83
- Select Division Point 85
- 002 00:00:18 85
- ●Releasing Skip 88
- LOCKING SCENES ON CARD (LOCK) 91
- ●To unlock the scene 91
- 3 Press the MENU button 92
- 5 Choose “Start → 92
- 5 Press the button to quit 93
- Programme 94
- 4 Select the programme 94
- PLAYING BACK PROGRAMME (PLAY) 95
- WHAT IS “PLAY LIST”? 97
- ●Editing on play list 98
- Scene to be added 100
- Insertion position 100
- Select Insert Poi n t 006/019 102
- ENTER RETURN 102
- DELETING PLAY LIST (DELETE) 103
- INITIALISING HDD/DVD/CARD 104
- Before You Begin 104
- PROTECTION 105
- MODE) (UPDATE CONTROL INFO.) 106
- 2 Press the MENU button 107
- 4 Choose “YES”, and then 107
- ●When Repeat Play is set 110
- ●To release Repeat Play 110
- Viewing on TV Screen 112
- VIEWING ON TV SCREEN 113
- Recording (Dubbing) Images 115
- 1 Set the input source on 116
- 3 Press the REC button 116
- Connecting to PC 118
- Requirements of available PC 119
- [When using Windows] 120
- 7 Choosing video system: 121
- 8 Executing installation: 121
- [When using Macintosh] 122
- ●Handling photos 124
- ●When removing disc 125
- ●When removing SD memory card 125
- 2 Start ImageMixer 3 127
- 3 Click “Create New DVD” 128
- 4 Setting up project 128
- 3 Choose Hitachi DVDCAM 131
- 2 Choose Hitachi DVDCAM 133
- 4 Create a DVD creation list 133
- 5 Write to a DVD 134
- Uninstalling Software 135
- Contact The Following 135
- Subsidiary Information 137
- Trouble Messages 138
- Reference 139
- Troubleshooting 145
- During recording 146
- During playback 147
- 1/ 6Al l scenes 148
- Symptom Cause and Correction 149
- Miscellaneous 150
- System Reset 152
- Major Specifications 153
- Recordable Time On HDD 155
- Recordable Time On Disc 155
- With external input 156
- Size And Quality Of Photos 156
- Licence Agreement 159
- Hitachi Australia Ltd 160
- Hitachi Hong Kong Ltd 160
Summary of Contents
DZ-HS500SWInstruction manualTo obtain the best performance and ensure years oftrouble-free use, please read this entire instruction manual.Инструкция
English10DISC CLEANINGUse the disc cleaning cloth provided to lightly wipe off any dirt adhering to the disc as shown in the figure. Do not wipe the d
English100DELETING SCENES FROM PLAY LIST (EDITING PLAY LIST)1 Press the DISC NAVIGATION button, and then press the MENU button.2 Display the editing
English101DELETING SCENES USING SUBMENU FOR EDITING (EDITING PLAY LIST)You can delete scenes from play list on the editing screen.1 Press the DISC N
English102ARRANGING ORDER OF SCENES (MOVE)1 Press the DISC NAVIGATION button.2 Press the MENU button.3 Use the 2/1/0/// buttons to choose “Select”
English103CHANGING TITLE OF PLAY LIST (TITLE)The play lists have serial numbers in the order you have created them, along with the created dates/tim
English104Go ToFrom the Disc Navigation screen, you can jump to the first scene or last scene, and playback will start from that point.MOVING TO
English105PROTECTIONYou can protect the HDD and a DVD-RAM/DVD-RW (VR-mode) in order to prevent recorded images from being erased or edited by mistak
English106UPDATING CONTROL INFORMATION OF HDD/DVD-RAM/DVD-RW (VR-MODE) (UPDATE CONTROL INFO.)Disc Navigation in this DVD video camera/recorder handl
English107FINALISING DVD-RW/DVD-R/+RW (FINALIZE DVD)If you want to play back a DVD-RW/DVD-R recorded/dubbed on this DVD video camera/recorder, usi
English108ADDITIONALLY RECORDING ON FINALISED DVD-RW (VF-MODE)/+RW (UNFINALIZE DVD)You can unfinalise the DVD-RW (VF-mode)/+RW finalised on this DVD
English109OthersDISPLAYING DUBBED/UNDUBBED SCENES IN LIST (CATEGORY)You can display all scenes recorded on HDD in this DVD video camera/recorder, by d
English11About This Manual●Displays in this manualUnderstand that the displays are different from those you will actually see in the viewfinder or on
English110PLAYING BACK SCENES REPEATEDLY (REPEAT PLAY)1 Press the DISC NAVIGATION button.2 Press the MENU button.3 Use the 2/1/0/// buttons to c
English111SLIDE SHOW (CONTINUOUS PLAYBACK OF STILLS)If you play back stills recorded on a card, the DVD video camera/recorder will enter the playback
English112Viewing on TV ScreenConnecting to a TVCONNECTING TO A TVUse the provided AV/S input/output cable to connect the DVD video camera/recor
English113VIEWING ON TV SCREEN1 Turn the TV on and set the input selector to “VCR” whichever applicable Video input.Refer to the TV instruction
English114Playback on DVD Recorder/PlayerPLAYING BACK DVD-RAM/DVD-RW (VR-MODE)You can use a DVD recorder or DVD player that conforms to DVD-RAM/D
English115Recording (Dubbing) ImagesRECORDING (DUBBING) IMAGES FROM OTHER VIDEO DEVICEYou can record (dub) images from other video devices to di
English1161 Set the input source on the DVD video camera/recorder to “LINE (L IN)”.Switch the input referring to “Input Source” on page 63.2 Turn on t
English117RECORDING (DUBBING) IMAGES ON OTHER VIDEO DEVICESYou can record (dub) images played back on this DVD video camera/recorder, on other video d
English118Connecting to PCSoftware ProvidedYou can utilise on PC the videos and photos recorded on this DVD video camera/recorder, using the PC
English119Requirements of available PC[When using Windows]• OS: Windows® 2000 Professional SP3 or higher Windows® XP Home EditionWindows® XP Professio
English12Introduction●Recording is possible on both HDD and DVD: In FINE mode, recording for up to 11 hours is possible on HDD; up to 30 minutes on DV
English120Installing Software[When using Windows]1 Turn the PC on.If you have been using the PC, terminate all running software programmes.2 Insert th
English1217 Choosing video system:The screen for setting the video system will appear, and then click “Next”.8 Executing installation:The setups for i
English122[When using Macintosh]1 Turn the Macintosh on, and insert the provided CD-ROM into the CD-ROM drive of Macintosh.2 Double-click the DVDHS7S
English123Connecting to PC via PC Connection CableUse the provided PC connection cable to connect the DVD video camera/recorder to PC as shown below.N
English124When connecting the DVD video camera/recorder to PC, the DVD video camera/recorder will be recognised as a drive. The drive will appear on s
English125●When removing disc[When using Windows]Use Windows Explorer or My Computer to choose the drive icon of DVD video camera/recorder.→ Right-cli
English126BEFORE TERMINATING PC CONNECTION (UNPLUGGING PC CONNECTION CABLE)/CHANGING OVER POWER SWITCH[When using Windows]1 Before unplugging the PC c
English127Using ImageMixer 3 for WindowsImageMixer 3 allows you to capture the images recorded on the DVD video camera/recorder into PC, edit the vide
English128CREATING DVD-VIDEO USING IMAGES RECORDED ON HDD/DISCYou can use the images recorded on the DVD video camera/recorder to create a disc that c
English1295 On the “Importing Device” screen, choose “Hitachi DVDCAM (HDD)” when the power switch is set to “HDD”; and “Hitachi DVDCAM” when the power
English13Table of ContentsImportant Information ...2For Your Safety ...
English1308 Click “Write” to create a DVD-Video.Clicking “Write” will display the screen for writing.Check “Create disc”, perform setting for write, s
English131Using ImageMixer 3 Mac Edition for DVDCAMImageMixer 3 Mac Edition for DVDCAM allows you to import the images recorded on this DVD video came
English132IMPORTING IMAGES RECORDED ON HDD/DISC INTO MACINTOSHImageMixer 3 allows you to import movie files recorded on HDD/disc into Macintosh as MPE
English133CREATING DVD-VIDEO USING IMAGES RECORDED ON HDD/DISCYou can use the images recorded on the DVD video camera/recorder to create a disc that c
English1345 Write to a DVD.You can check the video files in a DVD list. Select the video file you wish to check and click the Playback icon at the bot
English135Uninstalling Software[When using Windows]Use “Control Panel” to open “Add or Remove Applications”, choose the application to be uninstalled
English136Cautions when connecting DVD video camera/recorder to PCUse the AC adapter/charger to power the DVD video camera/recorder when connecting it
137EnglishSubsidiary InformationIntroduction to Optional AccessoriesCAMERA ACCESSORIESWide conversion lens (DZ-WL1)* (p. 51)Tele-conversion lens (DZ-T
English138Trouble MessagesA message may appear while you are operating the DVD video camera/recorder. If a message appears, refer to the following tab
English139Cannot combine scene. Unless consecutive scenes are selected, they cannot be combined.86Cannot combine scene of multiple programs. Create Pl
English14ADJUSTING COLOUR (WHITE BALANCE) ... 57USING THE ELECTRONIC IMAGE STABILISER (EIS)... 59RECORDIN
English140CARD ALMOST FULL Remaining space is only enough to record less than 10 stills.Delete unnecessary stills and try the card, or use another car
English141DVD error has occurred. Formatting is not complete.The disc may be dirty.Remove the disc and wipe off fingerprints, dust, etc. before reusin
English142DVD-R*, Input Source cannot be changed.Once a DVD-RW (VF-mode)/DVD-R has been recorded in the 16:9 mode, the input source will not be change
English143HDD error has occurred.Restart.HDD error probably occurred during editing of video file.Turn off this DVD video camera/recorder, and then co
English144*1• This message may also appear when dirt adheres to disc. If this message appears when a recorded disc is recognised immediately after it
English145TroubleshootingCheck to see the following before asking for a repair. If the suggested solution still cannot restore the DVD video camera/re
English146During recordingPower cannot be turned off.Detach the battery or AC adapter/charger once, and then press the RESET button of DVD video camer
English147During playbackFocus is not correct. Is it difficult to use auto focus with your subject?Focus manually.53Does manual focus icon appear?The
English148When the DVD video camera/recorder is connected to PCPlayback picture is momentarily interrupted.Is disc scratched or does dirt or fingerpri
English149Error occurs in playback of DVD video camera/recorder on PC.If error occurs with USB connection, the transfer rate is not sufficient. It is
English15ADDITIONALLY RECORDING ON FINALISED DVD-RW (VF-MODE)/+RW (UNFINALIZE DVD)... 108Others ...
English150Miscellaneous“Hardware Removal” results in error.Exit Windows® once, and then disconnect the DVD video camera/recorder. If your PC uses Wind
English151Operating sound is heard cyclically.This sound is heard because the disc is cyclically operated and does not indicate a fault.—Some vibratio
English152System ResetIf the DVD video camera/recorder does not operate normally, perform “System Reset”: The DVD video camera/recorder may recover to
English153• Some items will not appear depending on the disc or card inserted.Major SpecificationsInitial Setup Beep On p. 33Power Save Off p. 33Recor
English154Recording formatDVD-RAM/DVD-RW (VR-mode)Movie:Conforming to DVD video recording (DVD-VR) format (Dolby Digital)DVD-RW (VF-mode)/DVD-RMovie:C
English155STORAGE CAPACITY OF HDD/DVD/CARDRecordable Time On HDD*1Recordable Time On DiscMovie recordable time on one disc (on single side) (when reco
English156RECORDABLE STILLS (PHOTOS) ON CARDWith external input(The numbers of recordable stills above are only for reference)Size And Quality Of Phot
English157IndexNumerics16:9 ... 618 cm bare disc ...
English158Lens cap string attachment hole ...21Linear PCM ...154Lock ...
English159Be sure to read the following before opening the package of CD-ROMThis Agreement will take effect at the moment you open the package of the
English16Checking Provided AccessoriesMake sure that you have all the following accessories in package:Battery (model DZ-BP07PW):Portable power supply
EnglishThis manual was printedwith soy based ink.Printed in Japan ON-M(I)Printed on recycled paperQR71052 ©Hitachi, Ltd. 2007Hitachi, Ltd. JapanHitach
English17Names of Parts1 Hand strap attachment bracket (p. 20)2 Stereo microphoneTake care that the microphone is not blocked by a hand, etc., during
English189 Viewfinder (p. 31)10 Dioptre control (p. 31)To adjust the focus of image appearing in the viewfinder. (Pull out the viewfinder.)11 SLEEP/RE
English1922 FULL AUTO button (p. 55)To switch the DVD video camera /recorder to full automatic.23 FOCUS button (p. 52)To switch between manual focus a
English2Important InformationFor Your SafetyThe power switch turns the DVD video camera/recorder on and off, leaving the date/time feature unaffected.
English20SetupsThis section explains preparations for recording – setting up the DVD video camera/recorder and battery.Demonstration FunctionThis DVD
English21ATTACHING LENS CAP1 Attach the shorter end of lens cap string to the lens cap.2 Attach the longer end of lens cap string to the hand strap of
English22HDD/DVD/CardsThe following table lists the storage media (discs and cards) that can be used on this DVD video camera/recorder and the functio
English23HDD, DISCSNote:•This DVD video camera/recorder can use only the 8-cm bare discs not packed in a square cartridge, square caddy case or round
English24EXAMPLES OF DISCS THAT CANNOT BE USED ON THIS DVD VIDEO CAMERA/RECORDER• CD• CD-R• CD-RW• CD-ROM• DVD-ROM• DVD-Video• DVD-R (4.7 GB) for Auth
English25Preparations for Power SupplyUSING DVD VIDEO CAMERA/RECORDER WITH AC ADAPTER/CHARGERIt is recommended that you use the AC adapter/charger to
English26Setting Up the BatteryThe DZ-BP07PW battery (provided) has not been charged at purchase time: Charge it before using the DVD video camera/rec
English27●Battery charged statusYou can find out the charged status of battery by checking the CHARGE indicator on AC adapter/charger:Note:See “Troubl
English28●Continuously recordable time with fully charged battery (with no zoom operation, etc.)See the following table as a reference for how long th
English29BATTERY REMAINING LEVEL INDICATORWhen the battery is used to power the DVD video camera/recorder, the battery remaining level appears in the
English3IMPORTANT SAFETY INSTRUCTIONSIn addition to the careful attention devoted to quality standards in the manufacture of your video product, safet
English30Turning DVD Video Camera/Recorder On and OffWhile holding down the grey button at the right of power switch, set the switch according to each
English31Viewing ImagesVIEWING IMAGE ON LCD MONITOR SCREENIf you open the LCD monitor, you can monitor subject image on the LCD screen.1 Open the LCD
English32Setting Date and TimeSet the current date and time so that the date and time you make a recording can be recorded correctly.The followi
English33Initial SettingsPress the MENU button, and then use 2/1/0/// buttons to display the “Initial Setup” menu screen. See page 48 for detai
English34RESETTING MENU SETTINGS TO DEFAULTS (RESET)You can restore menu settings to defaults (initial settings at the factory (p. 152)). (Note, howev
English35LCD/EVF SetupADJUSTING BRIGHTNESS OF LCD SCREEN (LCD BRIGHTNESS) AND VIEWFINDER (EVF BRIGHTNESS)1 Press the MENU button, use the 2/1/0/
English36ADJUSTING COLOUR DENSITY (COLOUR LEVEL)You can adjust the colour density of the LCD monitor screen and viewfinder.1 Press the MENU button, us
English37Inserting and Removing Disc1Set the power switch to “DVD” or “OFF” .When the power switch is set to “HDD” or “SD”, the cover of DVD inse
English38Note:•If the cover of DVD insertion block is open, the ACCESS/PC indicator will blink when an image is displayed on the LCD monitor screen: I
English39Inserting and Removing Card1Open the LCD monitor.2 Turn the DVD video camera/recorder off.3 Open the cover of card insertion block.4 Inserti
English4Cautions on HDDSave the data recorded on HDD:• To back up the data recorded on HDD, save it on a DVD. It is also recommended that you use this
English40Basic TechniquesThis section explains about recording of movies and still images, and also basic settings on DVD video camera/recorder.R
English41Recording StillsNote:Recording of still images is possible on card.1 Remove the lens cap, and then point the DVD video camera/recorder at su
English42Swift Restart of Recording (SLEEP/RESTART button)If you press the SLEEP/RESTART button while in the recording pause status instead of t
English43On-Screen InformationVarious types of information will appear in the viewfinder or on the LCD screen during recording.INFORMATION DISPL
English441. Recording mode (p. 40, 41, 64)2. 16:9 mode (only in movie recording mode)(p. 61)3. Programme AE (only in movie recording mode) (p. 56)4. B
English4514. HDD, DVD/Card type15.Movie recording quality (only in movie recording mode) (p. 60)Still recording quality (only in still recording mode)
English46●Switching the information display modeYou can switch the display mode of on-screen information:Press the DISPLAY button.The full and minimum
English47●Interpreting symbols on LCD screen when recording with the screen facing the same direction as the lensNote:• If the LCD screen is set facin
English48Checking Flow of MenuThe following two on-screen menu modes are available with this DVD video camera/recorder:• Full Menu: To display all men
English49●Flow of Full Menu The shaded menu item can also be set using the Quick Menu.Refer to page indicated for details of each function.Camera Fun
English5Liquid crystal display (LCD) and viewfinder:• The LCD screen and viewfinder are the products of highly precise technology. Among the total num
English50ZoomingIf you continue to hold the zoom lever on the “T” control side with Dig. Zoom specified, the digital zoom will be activated midw
English51RECORDING SUBJECTS FOR STRONGER WIDE-ANGLE OR TELEPHOTO EFFECTUse the tele-conversion lens or wide-conversion lens with the following filter
English52Manually Focusing SubjectThe DVD video camera/recorder usually focuses on a subject automatically (autofocus). You can also manually fo
English53Manually focus the following objects, which may not be automatically focused (see page 52):Objects not in the centre of screenObjects that ar
English54Adjusting Brightness of Image to be recorded (Exposure)The DVD video camera/recorder usually adjusts the exposure automatically. You ca
English55Using Full Auto FunctionPressing the FULL AUTO button will fully automate the camera functions.1 Press the FULL AUTO button.“FULL AUTO”
English56Setting Up Camera FunctionsSELECTING SHOOTING MODE TO MATCH THE SUBJECT (SWITCHING PROGRAMME AE MODE)This DVD video camera/recorder aut
English57RECORDING DARK SUBJECTS USING LCD MONITOR LIGHTWhen Programme AE is set to Low Light, you can use the light from LCD monitor to record a subj
English581 Press the MENU button, use the 2/1/0// buttons to choose “White Bal.” on the “Camera Functions Setup” menu screen, and then press the but
English59USING THE ELECTRONIC IMAGE STABILISER (EIS)When you use zoom (see page 50) to record a magnified subject image, it will correct fuzziness in
English6Do not use the DVD video camera/recorder near corrosive gas:• If the DVD video camera/recorder is used in a place where there is dense exhaust
English60Setting Up Record FunctionsSWITCHING MOVIE QUALITY (VIDEO MODE)Choose the movie quality from “XTRA”, “FINE”, “STD”.1 Press the MENU butt
English61SETTING TO WIDE TV SCREEN MODE (16:9 MODE)When viewing recorded images later on a wide-screen TV (aspect ratio 16:9), specify wide-scree
English62An image recorded with “16:9 On” specified will appear as follows:Images recorded with “16:9 Off” specified will appear as follows:Note:• The
English63SWITCHING QUALITY OF STILL IMAGE (QUALITY)You can switch the still recording quality.1 Press the MENU button, use the 2/1/0/// buttons to c
English64SWITCHING EXTERNAL INPUT RECORDING METHOD (PHOTO INPUT)When “Input Source: LINE” is specified, you can record stills of externally input ima
English65SETTING ON-SCREEN DISPLAY OUTPUT ON OR OFF (OSD OUTPUT)If you connect this DVD video camera/recorder to a TV to view images on TV scree
English66Disc NavigationUsing Disc NavigationSTARTING OR TERMINATING DISC NAVIGATIONDisc Navigation is a tool for editing scenes recorded on thi
English67Disc Navigation screenIcons to be displayed on thumbnail: ... Dubbed mark (p. 80)2 ...Fade-in (p. 87)
English68PLAYING BACK FROM DISC NAVIGATION SCREEN1 Press the DISC NAVIGATION button.2 Use the 2/1/0// buttons to select the desired scene.The selected
English69PLAYING BACK LATEST RECORDED SCENEPlaying Back1 Press the button in the recording pause status.The DVD video camera/recorder will ent
English7Do not turn the DVD video camera/recorder off while the ACCESS/PC indicator or CARD ACCESS indicator is lit or blinking:• The ACCESS/PC or CAR
English70CAPTURING PHOTOYou can record an image displayed during playback of video as a photo on a card.1 Press the MENU button at a scene you wi
English71SKIP PLAYBACK OF MOVIEDuring playback, press the 2 or 1 button to locate the start of desired scene.Press 1 once:To skip to the first im
English72JUMPING TO SPECIFIED POINT (GO TO)1 Press the MENU button during playback.2 Choose the option (point you want to go to), and then press
English73INFORMATION DISPLAY DURING PLAYBACKVarious types of information on recording will be superimposed on playback image you are viewing.●Sw
English74SELECTING MULTIPLE SCENES1 Press the DISC NAVIGATION button.2 Use the 2/1/0// buttons to select the desired scene.3 Press the PHOTO/SELECT bu
English75FUNCTIONS AVAILABLE WITH DISC NAVIGATIONThe Disc Navigation mode will allow a variety of further operations.Functions Available with Disc Nav
English76UNDERSTANDING FLOW OF DISC NAVIGATION MENUPress the MENU button on the Disc Navigation screen: The menu screens for Disc Navigation and menu
English77●When using DVD-RAM/DVD-RW (VR-mode)Scene Edit (p. 84) Divide (p. 85)Effect (p. 87) Delete (p. 84)Copy*2(p. 90) Combine (p. 86)Select (p. 92)
English78●When using DVD-RW (VF-mode)/DVD-R/+RW●When using cardScene Select (p. 92) Start → Current (p. 92)Detail (p. 93) Current → End (p. 92)All (p.
English79Dubbing on DVDThis DVD video camera/recorder allows you to choose the desired method when dubbing images recorded on HDD to a DVD:“New”: To
English8Cautions When StoringDo not leave the DVD video camera/recorder in a place where the temperature is very high for a long period of time:• The
English80• If you want to dub only the scenes with dubbed marks , “Category” in HDD setting should be designated (see page 109).• Marks will appea
English814 Replace the DVD.If one disc cannot contain all scenes, the screen for verifying DVD replacement will appear. To continue dubbing, press the
English82DUBBING ALL SCENES RECORDED ON HDD (DUBBING “ALL”)You can dub all scenes recorded on the HDD to a DVD from the beginning in sequence. If the
English83SELECTING SCENES RECORDED ON HDD AND DUBBING THEM (SCENE “SELECT” DUBBING)You can select desired scenes recorded on HDD and dub only those sc
English84SceneDELETING SCENES (EDIT – DELETE)You may want to delete unwanted scenes.Scenes on DVD-RW (VF-mode)/DVD-R cannot be deleted, and menu it
English85●Editing using submenuPress the MENU button before pressing the button in step 5 (see page 84): The submenu will appear.Pressing the butt
English86COMBINING MULTIPLE SCENES (EDIT – COMBINE)If you have recorded numerous short scenes, combining them will be facilitated by the use of Disc
English87DIRECTING SCENES EFFECTIVELY (EFFECT – FADE)You can add fading to the beginning and/or end of scene.There are three types of special effect
English88PLAYING BACK BY SKIPPING SCENES (EFFECT – SKIP)You can specify “Skip” for scenes you do not want to play back: The selected scenes will be
English89CHANGING IMAGES FOR THUMBNAILS (EFFECT – THUMBNAIL)Normally, the first image of the recorded scene is displayed as a thumbnail: You can cho
English9CLEANINGBe sure to set the power switch to “OFF” before cleaning this DVD video camera/recorder.●Cleaning LCD screen and camera lensUse dry, s
English90COPYING STILLS ON DVD-RAM TO CARD (COPY)1 Set the power switch to “DVD“.2 Press the DISC NAVIGATION button.3 Place the cursor on the scene
English91LOCKING SCENES ON CARD (LOCK)You can lock each photo recorded on card so that it will not be deleted or edited by mistake.1 Set the power sw
English92SELECTING SCENES USING MENU SCREEN (SELECT)You can use this “Select” function to select consecutive scenes at one time.This function is
English93DISPLAYING INFORMATION USING MENU SCREEN (DETAIL)You can display various information for a scene: the recording mode, recording date/ti
English94ProgrammeWHAT IS “PROGRAMME”?Programme refers to an assembly of scenes recorded on the same date regardless of whether they are movie or stil
English95PLAYING BACK PROGRAMME (PLAY)You can play back only the selected programme.1 Press the DISC NAVIGATION button.2 Press the MENU button.3
English96Note:• If you wish to delete the letter for title, press the button once: The input letter will be deleted. Holding down the button will d
English97Play ListWHAT IS “PLAY LIST”?You can create a play list on this DVD video camera/recorder by gathering your favourites from the recorded sc
English98SWITCHING TO DISPLAY OF EACH PLAY LIST (SELECT)Select the desired one of multiple play lists: The Disc Navigation screen of the selected pl
English99ADDING SCENES TO PLAY LIST (EDITING PLAY LIST)1 Press the DISC NAVIGATION button.2 Press the MENU button.3 Use the 2/1/0/// buttons to cho
More documents for Camcorders Hitachi DZ-HS500SW

Related products and manuals for Camcorders Hitachi DZ-HS500SW
 (39 pages)
(2 pages)
(2 pages)
(2 pages)
(63 pages)
(54 pages)
(160 pages)
(39 pages)
(2 pages)
(2 pages)
(2 pages)
(63 pages)
(54 pages)
(160 pages)
 (170 pages)
(61 pages)
(68 pages)
(2 pages)
(170 pages)
(183 pages)
(60 pages)
(50 pages)
(50 pages)
(200 pages)
(170 pages)
(170 pages)
(61 pages)
(68 pages)
(2 pages)
(170 pages)
(183 pages)
(60 pages)
(50 pages)
(50 pages)
(200 pages)
© 2020, manymanuals.com. All rights reserved. | 0.465 s |
 Manymanuals.com
 Manymanuals.de
 Manymanuals.fr
 Manymanuals.it
 Manymanuals.pl
 Manymanuals.cz
 Manymanuals.es
 Manymanuals-pt.com
Comments to this Manuals